Have you ever wondered how to get a three column blogger? I found this wonderful tutorial on how to make it happen. Go HERE
I also found a wonderful blogspot background website. Go HERE

Saturday, May 29, 2010
Wednesday, May 26, 2010
When Life hands you lemons...
I love Pottery Barn, but not their prices. While flipping through their online catalogue, I found these cute fruit signs, but I wanted to put my own flare on them. 
 Step 1: Find the perfect piece of wood. I will not say where I got mine, because I don’t want to incriminate myself…
 Step 2: Pick three paint colors. I chose white as my base, brown as my middle color, and yellow as my topcoat. Paint your board the base color and let it dry.
 Step 3: To get a peeling paint look, randomly rub a candle over the board. Do not cover it, just little spots here and there will do.
 Step 4-5:Paint over the base coat and wax with your middle color. Wait for it to dry, then repeat step 3.
 Step 6: Paint your topcoat over the middle color- wait for the paint to dry.
 Step 7: Use a METAL- not plastic- scrapper. I used a razor blade. Scrape over the board. The paint that is over the waxy spots should peel right off exposing the paint colors underneath.
 Step 8: Paint a word on your board. I used the word LEMONS. Let the paint dry.
 Step 9: Sand, sand, sand. It will make it look worn.

 I have two other signs in the works. I hope I can get to them soon…
Saturday, May 22, 2010
Bird Post
All Thingz Related is a wonderful craft blog. While looking through her site, THIS post stood out to me. I love anything dealing with birds. I followed her tutorial- but she wasn't very detailed about some things, so I stumbled some, but I think it turned out OK.
 You need a candle stick, a small dowel cut to size, something to cover the hole in the candle stick- I used a small wood circle I had laying around, and a bird. I found this bird at Doller Tree.
 Glue everything together like so.
 This part is very important. You need to bend the wire feet to fit around the dowel. I didn't bend the back piece, so after trying to glue the bird on the dowel with E6000 glue and hot glue, I determined the only way to get that thing to stay was to bend the small back piece too and then glue it with hot glue. All Thingz Related used E6000 glue, but I found hot glue was better.
 I then spray painted the whole thing a cream color.
 After the spray paint was dry I smothered the whole thing with Walnut stain and wiped it off until I got my desired look. I like the stain, but I really need to invest in some glaze...

Saturday, May 15, 2010
Tomato Cage Mirror
I really LOVE starburst mirrors.  Look at the one I made in December.
Anywho, I wanted to make another one, especially after I saw this one: After studying the mirror, I discovered I needed three metal rings and some metal rods. Where can I get three rings?
  Answer: A TOMATO CAGE.
 I made- I mean asked nicely- if Matt would cut up the tomato cage so I could have my three rings and be on my way to creating a masterpiece.
  My Three Rings...Now where to get small metal rods?
 I used the metal stuff left over from our drop down ceiling home improvement project.
 I cut the long rod into small rods.
  Arranged a pattern around the rings.
 Since fire scares me, Matt soldered the rods onto the rings.
 The next day, I spray painted the body silver, to cover the burn marks and discolorations. I was going for this look, but
 After hot gluing my mirrors on, it turned out like this.
  I didn't like the look of it, so I went web surfing and found this mirror.
 I took most of the mirrors off, and followed- as best I could- the pattern above. I must say it looks much much better.
 Look at the one I made in December.
Anywho, I wanted to make another one, especially after I saw this one:
 After studying the mirror, I discovered I needed three metal rings and some metal rods. Where can I get three rings?
  Answer: A TOMATO CAGE.
 I made- I mean asked nicely- if Matt would cut up the tomato cage so I could have my three rings and be on my way to creating a masterpiece.
  My Three Rings...Now where to get small metal rods?
 I used the metal stuff left over from our drop down ceiling home improvement project.
 I cut the long rod into small rods.
  Arranged a pattern around the rings.
 Since fire scares me, Matt soldered the rods onto the rings.
 The next day, I spray painted the body silver, to cover the burn marks and discolorations. I was going for this look, but
 After hot gluing my mirrors on, it turned out like this.
  I didn't like the look of it, so I went web surfing and found this mirror.
 I took most of the mirrors off, and followed- as best I could- the pattern above. I must say it looks much much better.
Wednesday, May 12, 2010

Decorate Your Wall with Molding

Tuesday, May 4, 2010
Bird House Tower
I got this idea HERE. I saw it, liked it, and made my own.
 This is the birdhouse before I sanded it.
 I glued a candlestick to a base then to the bottom of the birdhouse and let it dry.
 Since I was going for a particular look, I painted the tower red.
 Then spray painted it yellow.
  After it dried, I sanded it, so the red would show through.
 Lastly, display it and enjoy it!
 This is the birdhouse before I sanded it.
 I glued a candlestick to a base then to the bottom of the birdhouse and let it dry.
 Since I was going for a particular look, I painted the tower red.
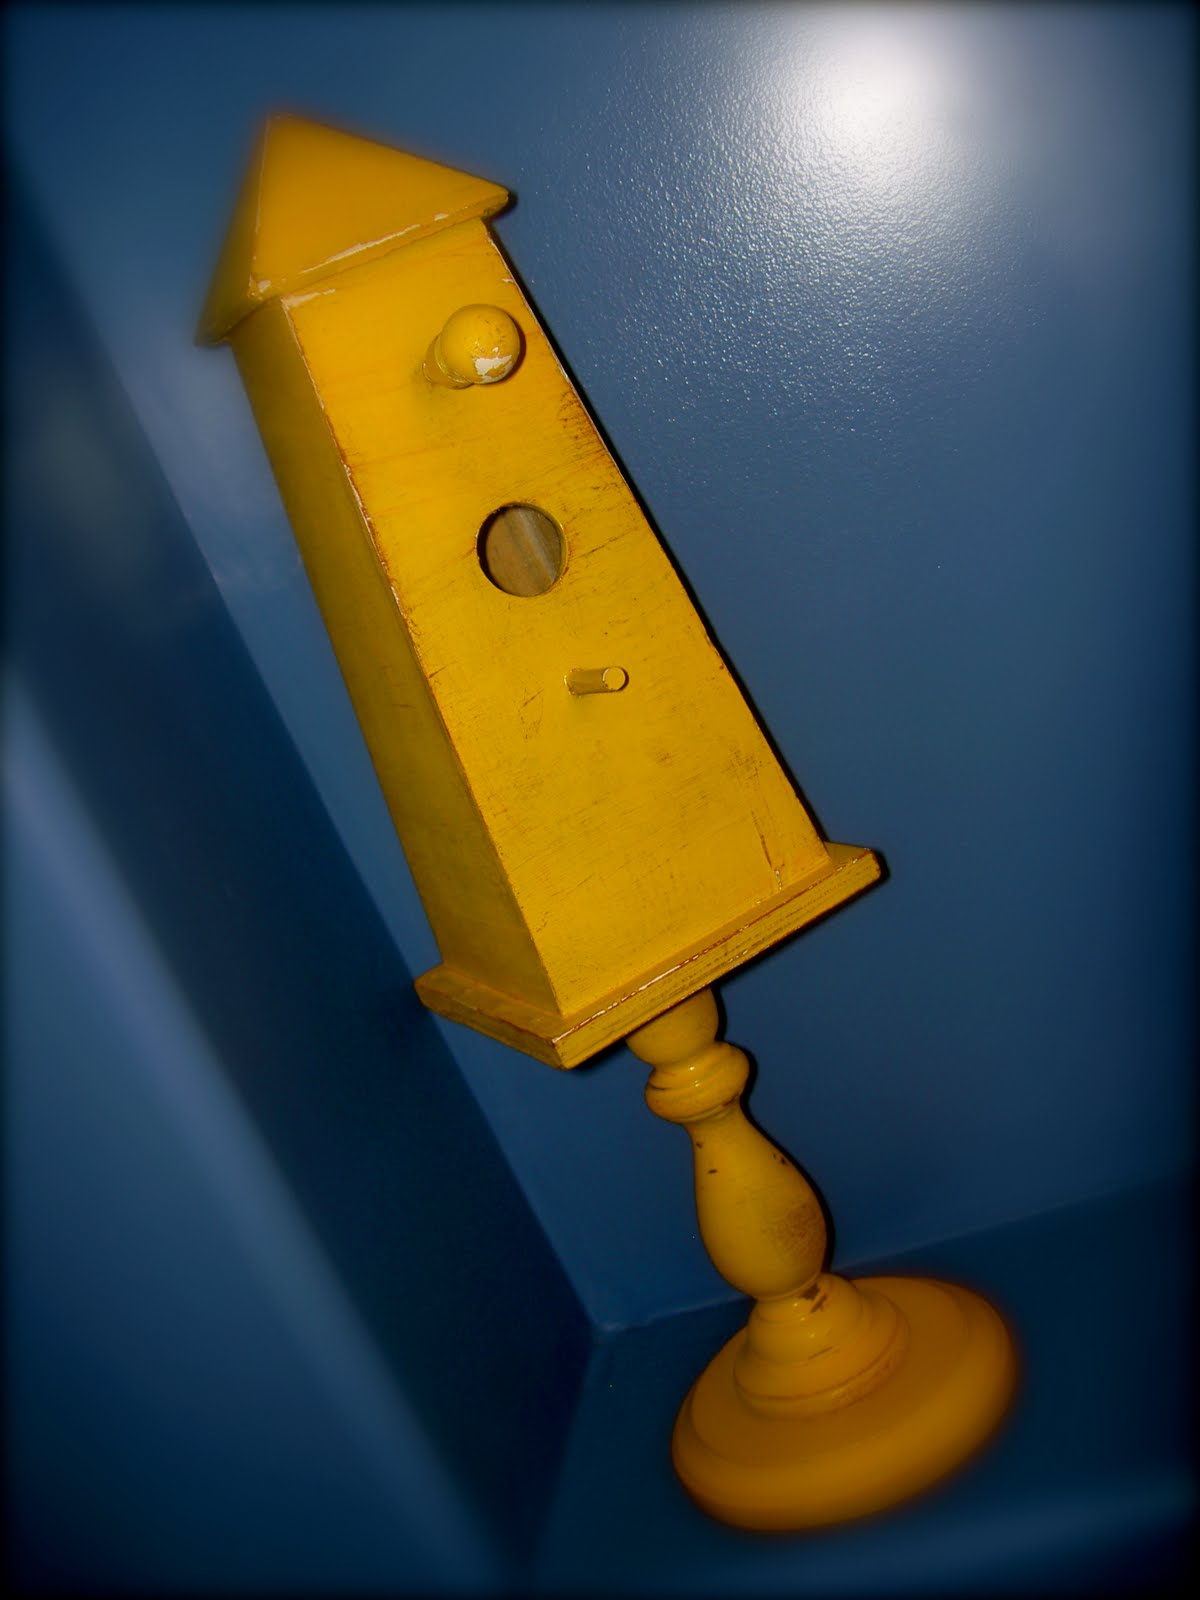 Then spray painted it yellow.
  After it dried, I sanded it, so the red would show through.
 Lastly, display it and enjoy it!
Saturday, May 1, 2010
Chickadee-doo
While driving around in my hood- I saw this cute white house with a cute bird hanging on the front door. Over the next week, I drove by and admired this bird. I couldn't get it out of my mind. So one day I took my camera and snapped a picture. Super Cute!
 I went home, and got to work. First I cut out a pattern. I free-handed it.
 Next, I went through my stash of fabric- and picked out a cute combination.
 Then I pinned the pattern to the fabric and cut out the pieces.
 And wahla I had the makings of a bird.
 Sew around the beak like so.
 Then sew around the legs like so.
 Next, pin the beak, legs and body together. Make sure the ribbon, beak and legs are INSIDE the body.
 After sewing together, cut little triangles around the whole bird.
 Ta-da you have a bird!
 But something is missing... An eye! Since I am not good at zig-zagging the edge of things- especially circles, I used some wonder under and attached that eye to the bird.
 Next, you gotta stuff that bird full of stuffing and stitch it up.
 Lastly, display it for the whole hood to see.
 To tell you the truth, at first I thought this was a craft fail, but I think it is starting to grow on me.
 Super Cute!
 I went home, and got to work. First I cut out a pattern. I free-handed it.
  Next, I went through my stash of fabric- and picked out a cute combination.
 Then I pinned the pattern to the fabric and cut out the pieces.
  And wahla I had the makings of a bird.
 Sew around the beak like so.
 Then sew around the legs like so.
 Next, pin the beak, legs and body together. Make sure the ribbon, beak and legs are INSIDE the body.
 After sewing together, cut little triangles around the whole bird.
 Ta-da you have a bird!
  But something is missing... An eye! Since I am not good at zig-zagging the edge of things- especially circles, I used some wonder under and attached that eye to the bird.
 Next, you gotta stuff that bird full of stuffing and stitch it up.
 Lastly, display it for the whole hood to see.
 To tell you the truth, at first I thought this was a craft fail, but I think it is starting to grow on me.
Subscribe to:
Posts (Atom)