Thursday, February 26, 2009

Dream Kitchen...


I found the perfect layout for my small kitchen. Thanks HGTV! Just imagine in the walls lime green and the cabinets white (remember I hate oak.)

Since I broke out the sewing machine... part 2

Last night I cut up some of Matt's old jeans and found some fabric I had lying around. I want to make a quilt, but I am not sure what kind of layout I want. So I Googled "quilt square patterns" and came across this fascinating, fun quilt square....

Website: http://justpurelovely.typepad.com/justpurelovely/2008/02/project-a-tutor.html

Here is how she did it:

1. Choose 9 different fabrics- 3 squares of each fabric for the block.

2. Cut the fabric into squares- cut 4" squares.

3. Sew the squares together, to make "9 patch" quilt blocks, which are each 3 squares wide by 3 squares long.

4. Cut the 9 Patch in half vertically.

5. Cut the 9 patch in half again, but this time horizontally. Keep the pieces together in their original position (as if you hadn't cut it already.)

6. Turn the cut pieces in any direction you fancy.

Quilt 7

7. Arrange all of the pieces in the order you find most pleasing.

8. Sew the pieces together.

Quilt Pink Full Fence copy


Since I broke out the sewing machine...

Since I now have a place to use my sewing machine, which by the way I bought way back in September, I have made scripture totes for my primary kids and a hooded towel for my neighbor. Both of these projects I went into blindly... both turned out awesome.

website for hooded towel:
http://blog.craftzine.com/archive/2007/12/hooded_kids_towel_tutorial.html

You need one bath towel and one hand towel
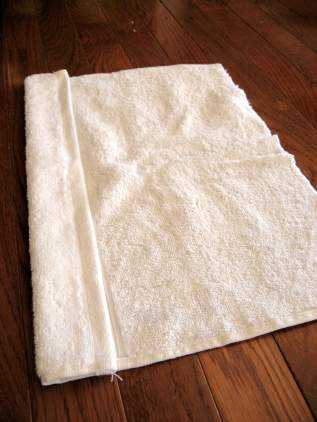
  1. Cut your hand towel in half

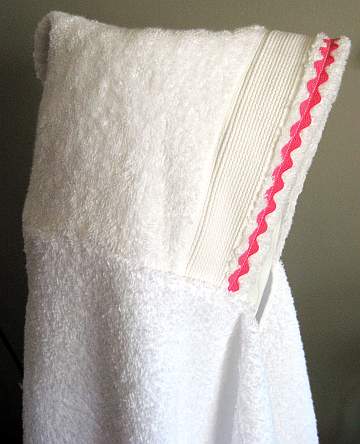
  2. Fold over the finished edge of the hand towel. I folded down just past the ribbing. You want to have about 10 1/2 inches in finished length. Stitch down the edge.

    hooded-towel-2.jpg

  3. If you want, stitch a little ric -rac to the front.

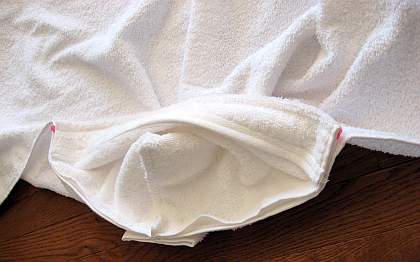
  4. 4. Fold hand towel in half right sides together, find the middle of the side and mark with a pin.

hooded-towel-5.jpg

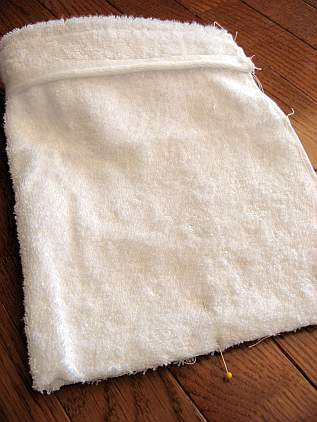
5. Bring the folded edge into the middle. You may have to remove the pin while you adjust the towel.

hooded-towel-6.jpg

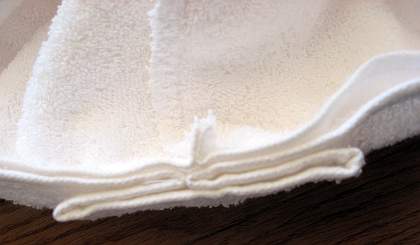
6. Stitch across the bottom edge making sure you catch all layers of the pleat. When finished stitching, zig zag or overcast your seam to prevent raveling.

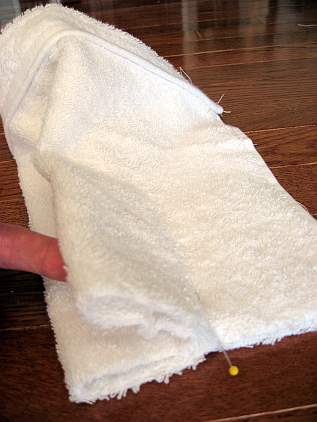
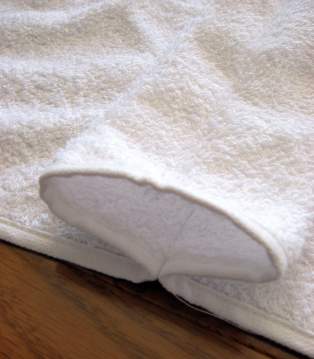
7. Fold the bath towel in half, right sides together.

8. Measure over 4 inches from the fold and 4 inches down from the top and stitch.

hooded-towel-9.jpg

9. Open bath towel flat and open and flatten the tuck. You can baste across the tuck if you want.

hooded-towel-10.jpg

10. With right sides together, line up center of bath towel and center of hood.

hooded-towel-12.jpg

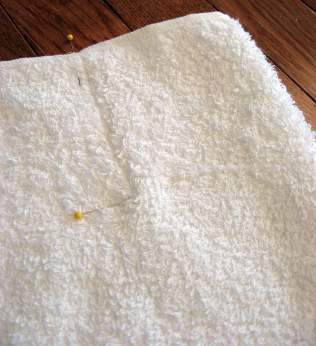
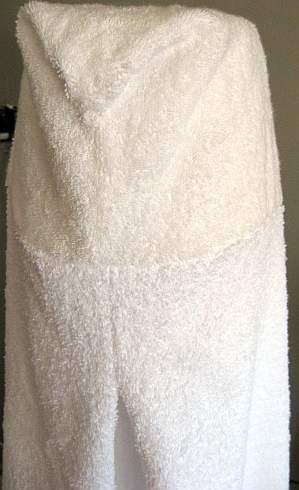
11. Pin hood to bath towel. You will stitch from the side edge of the hood across to the other side. Be sure to back stitch when starting and stopping to reinforce the seam. I stitched close to the edge along the inside of the towel’s finished edge.

hooded-towel-13.jpg

The finished towel looks like this

hooded-towel-14.jpg


I am really into wall panels


The picture with the canisters:
if you want to check it out here is the website:

http://www.apartmenttherapy.com/la/look/top-10-affordable-wall-treatments-048136


The picture with the couch:
if you want to check it out here is the website:

http://www.bhg.com/decorating/budget-decorating/cheap/low-cost-home-decorating-with-paper/?page=1

OR

http://www.bhg.com/crafts/home/accessories/clever-art-with-paper-scraps/?page=2

Cover 12-x-12-inch artist canvases (sold at Biglots for cheap)
with attractive paper patterns. Wrap the canvas like a present with a 1- to 2-inch overhang. Attach the paper to the front with double-stick tape, and secure the excess paper to the frame's back with electrical tape.

DIY craft projects


I have an oak bookcase (I hate oak) just hanging out in my kitchen waiting for me to do something with it. After browsing the internet I found a fun and easy DIY project that can help me with my predicament. The ugly brown thing is the before and the white chic piece is the after.

This is what they did:

Turning the vertical bookcase on its side transformed it into a clean-lined storage unit. After the frame was stabilized with screws, scratches were filled in with putty. Next, three long partitions and two small shelves were installed to carve out interesting storage nooks. The back of the unit and base were removed, and the unit was propped up on legs made from threaded metal flanges and pipes (I may forget the pipe thing and find something else.) Finally, the piece was painted a high-gloss white.

This is an outside project, I will have to wait until spring...